
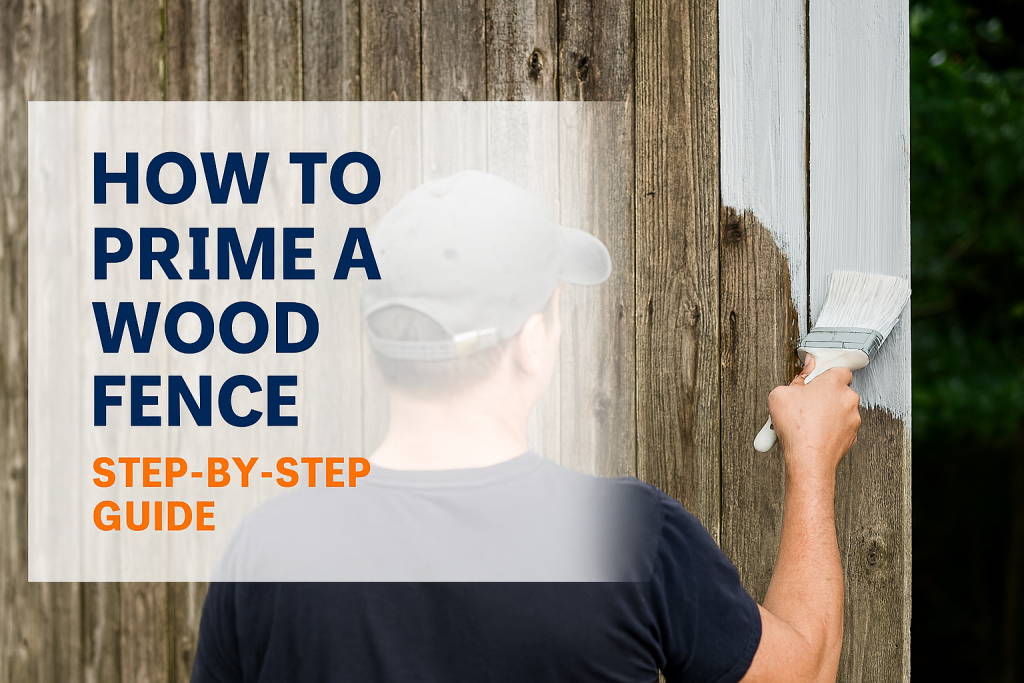
You step into your backyard and find the timber fence paint’s once-fresh finish now peeling and faded under Perth’s harsh sun. The raw wood is exposed to rain, insects and UV. Without proper protection, it can quickly rot or warp.
Priming your wood fence before painting is the only solution to stopping this damage and getting a long-lasting, flawless finish.
In this guide, we’ll explain why primer is essential, which primer to pick, and how to apply it step-by-step. We’ll also cover fence priming tips and FAQs to ensure your fence stays beautiful and protected.
Read on to give your wood fence the primer protection it needs!
Why You Need to Prime Your Wooden Fence
Applying primer before painting a fence extends the paint’s life significantly. All the following benefits together mean less frequent repainting and better protection:
- Longer-lasting paint – Primer provides a durable base that helps topcoats adhere. Paint clings firmly and resists peeling.
- Seals and protects wood – A quality primer seals the timber which locks out moisture and guards against rain, rot and sun damage.
- Blocks stains and tannins – Knots and natural oils in woods like cedar or redwood can bleed through paint. A primer (especially oil- or shellac-based) prevents these stains, so your final coat stays clean.
- Prevents mould and mildew – Many primers include mildewcides and zinc to kill mold spores. In humid months, primer with mildew-fighting additives keeps mould from ruining your paint.
- Even, consistent finish – Primer creates a uniform surface so paint covers evenly. Without it, bare wood absorbs paint like a sponge which results in blotchy coverage and faster wear.
Choosing the Right Primer for Wood Fence
Choosing a primer depends on your wood and needs. There are three main types of wood fence primer. Oil-based, latex (water-based) and shellac primers. Each has strengths:
1. Oil-Based Primers:
Oil-based primers penetrate deeply and block tannins. Ideal for cedar, redwood or any wood with knots. They create an impermeable barrier that seals wood cells. Drawback: they take longer to dry and have higher VOCs.
2. Latex (Acrylic) Primers:
Acrylic latex primers are water-based, faster-drying and low-VOC. They’re flexible and easier to clean up. Good for pine, general softwoods or pre-primed surfaces. Modern exterior latex primers can seal well, though they aren’t quite as impermeable as oil.
3. Pigmented Shellac Primers:
Shellac primers are superb at blocking extreme stains and tannins. They dry very fast. Use shellac when you have stubborn water or smoke stains, or if oil or latex can’t cover a bleed.
Choose based on wood type and conditions.
For example, oil-based primers for cedar and Douglas fir to lock in wood pigments, whereas ordinary pine or treated fence boards do fine with a quality acrylic latex primer. Also check VOC levels. Water-based primers are usually low or no VOCs which is safer and eco-friendly.
Top 5 Wood Fence Primers in Perth
Primer (Top 5) | Coverage (m²/L) | VOC Level | Key Feature / Finish |
Dulux 1Step® Oil-Based Primer | 10 – 12 m²/L | High | Fast-dry; excellent stain-blocking |
Zinsser Bulls Eye 1-2-3 | 12 m²/L | Medium | Self-priming; blocks tannins and mildew |
Dulux 1Step® Prep (Water-Based) | 14 m²/L | Low | Good adhesion; low-VOC, mould-resistant |
Wattyl Acrylic Timber Primer | 12 m²/L | Medium | Smooth base; resists cracks/peeling |
Resene Quick Dry Primer Undercoat | 12 m²/L | Low (Eco) | Fast-drying; low-sheen for paint grip |
These are representative examples. Coverage can vary by surface porosity. Note which primers contain mildewcides for humid Perth conditions. For example, Zinsser and Dulux Oil primers block mildew and stains. Always read the label for coverage and drying times.
Tools & Materials You’ll Need to Prime Your Wood Fence
Gather these basics before you start:
Tool/Material | Purpose/Use |
Stiff-bristled broom or brush | Remove sawdust, dirt and loose debris from the fence surface. |
Wire brush / Scraper | Scrape off stubborn residue, mill glaze or old paint flakes after initial cleaning. |
Pressure washer | Power-wash the fence to strip away dirt, mildew, and grime (keep nozzle 12″ away). |
Sandpaper or sander | Smooth rough spots, remove any remaining loose fibers or splinters (use 80–120 grit). |
Paint stirrer (wooden stick or drill mixer) | Thoroughly mix the primer to a uniform consistency before use. |
Paintbrush (exterior synthetic) | ‘Cut in’ edges and apply primer into tight corners. Synthetic bristles are recommended for latex/water-based primers. |
Paint roller & tray | Roll primer onto large flat panels evenly. A medium-nap roller covers rough wood efficiently. |
Paint sprayer | Spray primer quickly on extensive fence runs; use a compatible filter and low pressure to avoid clogging. |
Drop cloth or plastic sheeting | Protect surrounding plants and ground from drips and overspray. |
Gloves (latex or nitrile) | Protect your hands from primer and cleaning solutions. |
Respirator or dust mask | Prevent inhaling fumes or fine particles; essential if spraying primer. |
Safety goggles | Shield eyes from splashes during cleaning or spraying. |
Exterior wood primer | Use a high-quality fence primer. Choose exterior-grade (oil-based for bare wood) to seal and protect timber. |
How to Apply Wood Fence Primer – Step-by-Step Guide
Proper prep and technique make the job easy. Follow these steps for a flawless primer coat:
Step #1. Determine the Timber Type
Identify whether your fence wood is hardwood, softwood (e.g. treated pine), or another type. The wood species and condition affect primer choice and performance.
For example, freshly cut or highly porous woods may soak up primer more than dense hardwoods.
Step #2. Ensure the Wood is Dry
Allow new lumber to air-dry for almost 6-8 weeks before priming. In wet or cool climates, wait longer until humidity drops.
Check by sprinkling water on the wood. If droplets bead up and don’t soak in, the wood is still too damp. If the water is absorbed, the timber is ready for primer. Avoid priming on rainy or very humid days.
Step #3. Clean and Prep the Fence Surface
Thoroughly clean the wood so primer will adhere properly. Sweep or brush away sawdust, leaves and loose dirt.
For older or dirty fences, use a garden hose or pressure washer to rinse off caked-on grime. Hold the nozzle 12 inches from the wood and move in smooth, sweeping passes.
After washing, sand or scrape off any remaining rough spots or old paint chips with sandpaper or a wire brush. Remove protruding nails or splinters. Let the fence dry completely after cleaning.
Step #4. Choose Your Application Method
Decide how you will apply the primer; brush, roller or sprayer.
For a long stretch of fence, an airless sprayer can save time. Use a proper filter and low pressure to keep the primer flowing smoothly. For smaller fences or detail work, a quality brush and roller give more control.
As a rule, rollers cover flat panels quickly, while brushes are best for posts, rails and tight spots.
Step #5. Wear Personal Protective Equipment (PPE)
Always prioritise safety. Put on gloves and a respirator or mask, and wear goggles when cleaning or spraying.
Water-based primers are lower in fumes, but sanding or pressure washing will still kick up particles, and spraying creates mist. Gloves and eye protection prevent irritation.
Step #6. Stir the Primer Thoroughly
Open the primer can and stir its contents well to mix any settled pigments. Use a wooden or metal stir stick (or a mixer on a drill) and stir for several minutes until the colour and consistency are uniform. Follow any specific mixing instructions on the label.
Step #7. Check Temperature and Conditions
Make sure conditions are right for priming. Most primers apply best when temperatures are above about 50°F (10°C) and below roughly 85°F.
We recommend not painting outdoors in temperatures under 50°F.
Avoid priming if rain is likely within 4–8 hours or if dew is expected. Work in the shade if the fence is in hot sun to prevent the primer from drying too fast.
Step #8. Apply the Primer Evenly
Use your brush/roller/sprayer to coat the entire fence surface. Apply smooth, uniform strokes with the wood grain to avoid streaks.
Take care not to overload tools to prevent runs or drips. One full coat of primer is usually sufficient. Check the can’s instructions. If using a sprayer, overlap passes slightly. If brushing, back-brush slightly into the roller coat for an even finish.
Step #9. Allow Adequate Drying Time and Clean Up
Let the primer cure fully before painting on top. Many water-based primers become touch-dry in 20–30 minutes and recoat-ready in about an hour. Oil primers may take longer.
Always follow the manufacturer’s recommended dry time. When finished, clean brushes, rollers and sprayer with warm soapy water. Remove drop cloths and dispose of any leftover primer or packaging according to local regulations.
Fence Priming Tips for a Flawless Coat & Finish
The following concise tips, along with the step-by-step plan above, will help you achieve a smooth, durable primer coat on your fence:
- Pick the Perfect Weather: Choose a day when temperatures are moderate around 10–30°C and humidity is low. Avoid direct sunlight or very humid/rainy days.
- Work Top to Bottom: Always prime from the top of the fence down. This prevents streaks or drips from ruining already-primed areas.
- Thin, Even Strokes: Use smooth, continuous brush strokes on edges and a roller in one direction on panels. Overlapping your roller strokes helps avoid lap marks.
- Prime the Details: Don’t neglect end grains and corners. Use a brush to saturate all edges and gaps; these soak up primer. A common trick is to pre-tint white primer with a bit of your finish paint (if allowed) to see coverage.
- Keep Brushes & Rollers Wet: If you pause, wrap brushes or roller heads in plastic to prevent drying. This keeps your application even.
- Maintain a Wet Edge: Work in sections that meet while still wet, especially when rolling, to avoid visible lines.
- Remove Mildew First: If you see any mould, clean it before priming as primer locks in what’s on the surface.
- Clean Up Quickly: Oil-based primers require solvents to clean; water-based primers clean up with soap and water. Avoid letting primer dry on tools.
Still worried your fence might need more than DIY?
Call in the Pros | Prime Your Wood Fence for Lasting Beauty & Protection
Final Touch Paint & Decor specialises in fence painting and priming services in Perth.
With over 30 years of experience, our skilled team thoroughly cleans, sands and seals your wood before painting. We use premium, weather-resistant primers and paints that guard against sun, rain and pests. We guarantee a hassle-free, long-lasting finish, boosting curb appeal and protecting your fence’s longevity.
Don’t let peeling paint or water damage linger.
Contact our professional painters and ensure your fence lasts for years to come.
FAQs About Wood Fence Primer
Q1: Can I use an interior primer outside?
Generally, no. Interior primers lack weatherproofing and UV resistance. Use an exterior or mould-resistant primer for outdoor fences.
Q2: Do I always need a primer under fence paint?
Yes. Priming is essential on raw wood to ensure adhesion. Some modern fence paints can act like their own primer on new, dry wood, but primer is wise in shady or damp spots. It helps paint stick better, last longer and prevents issues like peeling.
Q3: What’s the best primer for a wood fence?
Exterior Latex Wood Primer for fences are the best choice. However, many professionals favour oil-based primers on wood with knots for their stain-blocking power. Products like Dulux 1Step Oil Primer or Zinsser 123 are top choices. Choose one that’s specifically formulated for exterior wood and tannin blocking.
Q4: What’s the difference between a primer and an undercoat?
In simple terms, a primer seals and prepares the surface for paint. An undercoat is a tinted primer/paint that provides a colour base before the final finish. We can say: “primer” = surface sealer, “undercoat” = base layer to improve colour coverage.
Q5: How many coats of primer should I apply to a fence?
Two thin coats is best. Apply one even coat, let it dry, then a second coat. Two light coats will cover better than one thick coat, and help block stains thoroughly.
Q6: What happens if I paint wood without primer?
Skipping primer means trouble. The paint won’t seal properly, leading to uneven colour and likely peeling. Wood grains and knots will bleed through, making the fence look patchy. New wood soaks up paint like a sponge which results in poor coverage and a finish that lasts only a few years without primer.
Q7: Do I need a special primer for wood?
Use a primer rated for exterior wood. Highly resinous woods benefit from oil-based primers that stop resin bleed. For already-sealed or painted wood, a standard quick-dry acrylic primer serves. Always match the primer to your topcoat. Water-based primer is best for latex paint. Oil-based primer goes well for oil paint.
Q8: Can I use white paint as a primer?
No. Regular white paint has too much pigment and not enough sealing binder to act as a primer. Primers have higher resin content and are formulated to seal wood and block stains. Substituting plain paint for primer will compromise adhesion and coverage.
Q9: Can I paint over primer the same day? How long do I wait after priming?
Check the primer label. Many acrylic primers dry to touch in 30 min and allow topcoat in 1–4 hours. However, for best results, let primer fully cure for almost 24 hours before painting. Rushing can trap moisture and cause fish-eyes or poor flow in the paint.
Need more help? See our related articles on: