
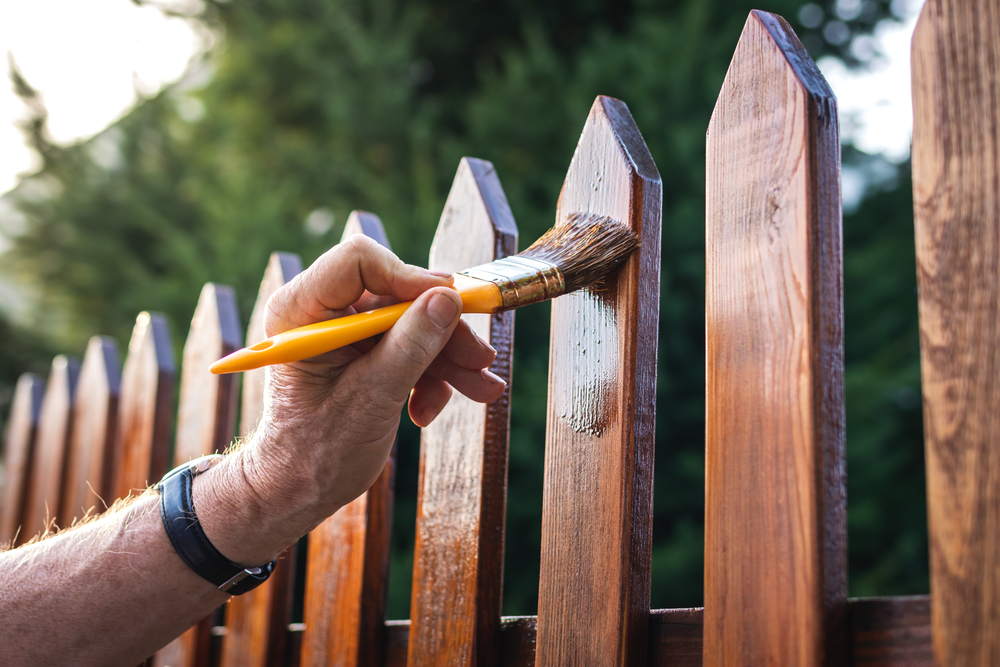
Is your fence looking tired, chipped or weathered? A fresh coat of fence paint can give it a new look and seals the wood against Perth’s harsh sun, seasonal rains, and even pests. Generally, fences in Western Australia should get a new topcoat every 2–3 years to stay in top condition.
But proper fence painting preparation and know-how is important for long-lasting results.
This guide covers what you need to paint your fence right. We’ll provide you with expert tips for painting fence according to WA’s harsh climate, from planning and cleaning to choosing the best paint and colours for a professional-quality finish.
Let’s get started.
Why Paint Your Fence? Protection and Curb Appeal
Your fence is the first thing people see in your yard, so a painting it with a fresh coat offers more than just good looks. It’s one of the simplest ways to:
- Refresh and enhance your outdoor space.
- Protect the fence against rain, sun (UV) and pests which prevents wood from rotting or weathering, helping it last for decades.
- Boost curb appeal and tie the fence into your home’s look or highlight garden plants.
- Keep up with maintenance, catching minor wear early before it becomes a costly replacement.
So, now you know why painting your fence is worth the effort. But how do you actually get it right in Perth’s harsh weather? Let’s walk through it step by step.
9 Expert Fence Painting Tips Every Perth Homeowner Should Know
1. Inspect, Repair and Prep Your Fence
Before you pick up a brush, take a good walk along your fence line and inspect every panel. Look for:
- Rot or damage – Cracked or spongy timber, termite damage, or broken boards.
- Loose or rusty hardware – Nails or screws backing out, or rusted hinges on gates.
- Old finish issues – Flaking paint, mouldy patches, or areas that have never been coated.
If you find any damaged sections, repair them first. Replace rotten boards, sand or strip away loose old paint, tighten loose screws or nails, and remove any nails or staples that protrude. Addressing these problems now saves time later.
Pro Tip: Lay down canvases or drop cloths to protect nearby plants or pavement from splatters.
2. Clean and Dry the Fence Thoroughly
A clean surface is important for lasting results. Dirt, mould, and peeling finish must be removed before painting. Work section by section:
- Wash the fence: Use a wood-safe detergent or fence cleaner and rinse well. A pressure washer on low-to-medium setting is ideal to blast away dirt and mildew.
- Rinse thoroughly: Keep rinsing until all soap is gone (water should run clear).
- Dry fully: Allow the wood to air dry 1–2 days. Painting on even slightly damp wood leads to poor adhesion and peeling.
Waiting for the fence to dry is especially important in Perth, where dry sunny weather will speed the process. Painting over wet or moist wood traps moisture and can cause paint failure or wood decay.
3. Prime and Protect
Priming is often overlooked, but a coat of exterior primer on bare wood or rust-prone metal makes a big difference. Primer helps paint adhere better and ensures even coverage.
Use an acrylic wood primer for timber fences, or a metal primer for steel/Colorbond fences.
In WA’s climate, priming is especially important if you’re changing to a lighter (or very different) colour.
Follow these fence priming tips for good results:
- Always prime new wood or any bare spots. This seals the surface and evens out the texture.
- For steel/Colorbond, use a quality exterior metal primer. This prevents corrosion and helps paint stick (see next section).
- Consider a tinted primer, if you’re painting a dark fence white or a light fence dark. A tint similar to your topcoat colour can reduce the number of paint coats needed.
- Once primed, let the primer dry as per manufacturer’s instructions (usually a few hours). Then you’re ready to apply your finish coats.
4. Choose the Right Paint for WA
Picking the best paint is important in WA. Due to strong UV exposure and occasional heat, you want a premium exterior paint designed for fences. In Perth, most fences are either timber or Colorbond (metal), and each needs a slightly different approach:
Fence Type | Recommended Paint Type | Why It Works Best | Pro Tips |
Timber Fence | 100% Acrylic Exterior Fence Paint (Water-Based) | § Expands/contracts with wood § UV resistant § Fast drying § Crack-resistant | § Choose paints labelled “Exterior Fence Finish” or “UV Resistant” § Brands: Dulux, Wattyl |
Colorbond/Steel | Water-Based Acrylic Paint (NOT oil-based) | § Adheres to metal § Resists flaking and rust § Matches Colorbond guidelines | § Avoid oil-based paints completely § Use a sprayer for even coats § Apply at least 3 coats § Brand: BlueScope Colorbond® |
Remember: Don’t skimp on quality. A cheap paint might save money up front but will peel or fade sooner, costing more in the long run.
5. Consider Fence Paint vs. Stain
For wood fences, another option is stain instead of paint. Paint and stain each have benefits and drawbacks. Let’s go through the:
Feature | Fence Paint | Wood Stain |
Appearance | Opaque, solid colour (hides wood grain) almost unlimited colour choices | Translucent, showing natural wood grain (solid stains exist but limited colours) |
Protection | Forms a thick film that blocks UV and moisture | Penetrates wood; moderate UV/moisture protection |
Longevity | Typically lasts longer; 5–6 years between coats | Usually needs reapplication after 3 years |
Maintenance | Can crack or chip before recoat time Repainting needs scraping/sanding old paint | Fades gradually; simply need a wash and recoat No peeling or chipping |
Application | Primer needed, thicker viscosity Brush, roller or spray can be used | Easier to apply uniformly pumps sprayers work well |
Colour Options | Virtually endless custom colours or bold choices | Limited palette of wood tones or semi-translucent tints |
In essence, if you want a natural wood look, stain is quick and low-key. If you prefer a solid colour finish and maximum UV protection, paint is the best choice. Paint will hide imperfections and cover old wood paint, whereas stain doesn’t do that.
6. Choose the Perfect Fence Paint Colour
Colour can make or break the look of your fence. Neutral and natural shades are always popular: greys, beige, soft greens and earthy browns blend with landscapes.
Brighter colours can be fun on a garden fence, while classic white or black fences make a bold statement. For example, black fence paint can give a crisp, contemporary look that really makes plants pop. On the other hand, a clean white fence paint brightens a yard but shows dirt more.
We recommend light greys or beige-white for front fences to keep them cool.
Want a picket-fence charm? Soft cream or classic white is timeless. Need a modern vibe? Try a mid-tone grey or even forest green. Whatever you choose, test a small area first.
And if you’re working with timber, know that natural wood tones pair well with earthy timber fence paint colours like muted greens and browns.
To make things easier, here’s an easy fence paint colours chart featuring the top 10 Dulux® colours popular across Western Australia.
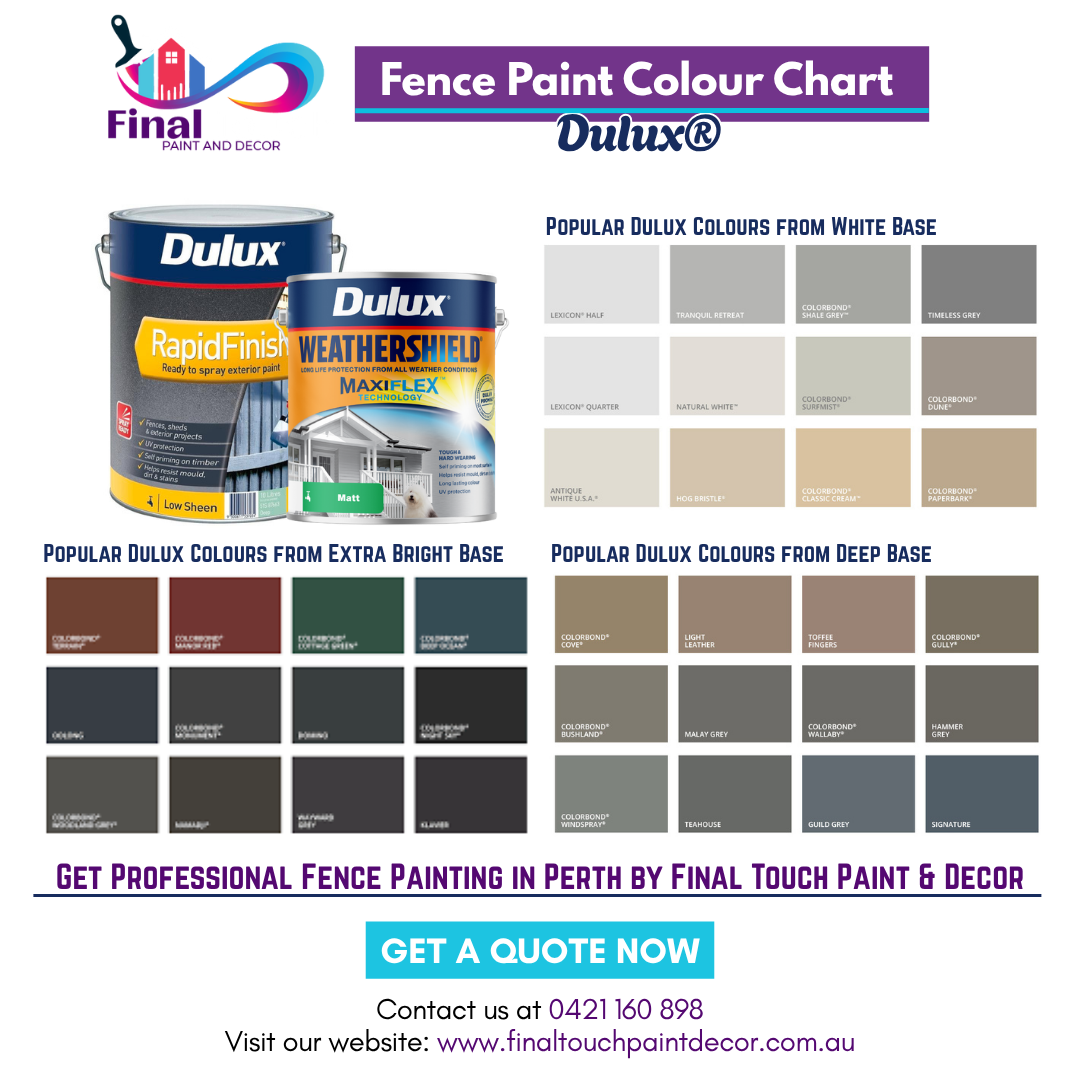
Check out the full Dulux Colorbond® Chart to find your perfect match. Need help choosing the right fence paint in Perth? Contact our painters in WA for an expert advice.
7. Applying the Paint: Steps and Tips
Once your fence is prepped and painted, you might be wondering how to apply the paint fence the right way? Follow these steps to get a smooth, even coat:
- Stir paint well: Before use, thoroughly mix your paint and let it sit. Even a fence finish can settle in the can.
- Use the right tools: For large fences or rough wood, a roller with a long handle extension works quickly. A good-quality synthetic brush is ideal for edges and touch-ups. For metal fences or very smooth surfaces, a paint sprayer gives the most even coverage.
- First Coat: Apply the first coat by working panel by panel. If using a brush/roller, paint with the wood grain for a timber fence. For Colorbond, you can paint in horizontal strokes. Don’t rush. Paint in thin, even layers to avoid runs.
- Drying time: Let the first coat dry fully before doing the next. In Perth’s climate this can be anywhere from a few hours to a full day depending on temperature and humidity. Do not recoat until dry. Always let one coat dry completely before applying the next.
- Second (and third) Coats: Apply a second coat the same way. For most timber fences, two topcoats (over primer) are sufficient. If you’re covering a very dark colour or painting Colorbond, plan for a third coat.
Remember: many thin coats are better than one heavy coat.
- Check for thin spots: After the final coat dries, inspect the fence. Touch up any streaks or thin areas as needed.
Pro Tip: Keep the end of your brush or roller wet by frequently reloading paint. This avoids dragging a dry brush across the wood.
8. Check Weather and Timing: Perth-Specific Tips
Perth’s weather can make or break your paint job. Keep in mind these tips for painting fence in WA climate:
- Pick a dry, mild day: Paint when the temperature is moderate; not too hot, not too cold. Try painting early in the morning when the wood is cool and avoid full midday sun. In Perth, that usually means starting before 9am or working late afternoon. Early summer mornings are ideal.
- Avoid wind and dust: A gusty day can blow leaves or dirt onto wet paint. Check the forecast. Don’t paint if strong winds or storms are predicted.
- Skip rainy or humid times: Painting on a rainy day is a no-go. Humidity prevents paint from curing and causes streaks. No matter what, always check the 24–48 hour forecast before you start. If rain is coming, wait. Perth’s rainy season is winter, so summer (October–March) is usually best. But avoid the peak of summer heat (above 30°C), as paint may dry too fast and crack.
- Sun protection: The UV index is high in WA. Some premium paints have built-in UV stabilisers. If using a brand without, consider a clear UV-resistant sealant topcoat (though usually acrylic paints do).
9. Consider DIY Painting vs Hiring a Professional Painter
Painting your own fence can save money, but it’s a big job. For small, single-storey fences in good condition, a DIYer can handle it with some elbow grease. However, consider these points:
- Fence Size and Height: Tall fences or multi-tiered fences (e.g. pickets plus a concrete base) can be tricky. You’ll need ladders or scaffolding.
- Painting Tools: Pro spray guns get a finer finish faster, especially on metal fences. Brushes/rollers can’t match a sprayer’s speed for large surfaces.
- Time: Painting properly (incl. prep and drying) can take several days. Hiring a team can cut this to a day or two.
- Quality: Professionals have experience smoothing out imperfections, matching colours panel-to-panel, and using the latest paints and techniques.
If your fence is old, high, or metal, or if you simply want a guaranteed great finish, hiring an experienced Perth painter is worth it. They’ll handle the prep work which is the real key to durability. Plus, they often offer a workmanship warranty.
Feeling overwhelmed by all that prep? You’re not alone.
Save Time & Get Perfect Results with Final Touch Fence Painting
We know that your time is valuable and your fence is important for your home’s look and protection. Our experienced WA painters handle everything from cleaning and priming to expert colour advice and flawless painting.
With Final Touch Paint & Décor, you get locally trusted fence painting services. We use premium paints and techniques built for Western Australia’s climate, ensuring your fence stays fresh and durable.
So, stop stressing and get ready to enjoy that new fence look.
Click below to get started. Your free quote is just a moment away.